
Development
How to share new listings on Pinterest using Zapier
Alejandro Schmeichler
Today I want to share with you a tutorial to show you how easy it is to extend the functionality of JReviews 3 to work with different services. You will learn how to integrate JReviews with Pinterest using Zapier to automatically create a pin when a listing is created. To build this integration we are going to take advantage of JReviews Developer Events, introduced in JReviews 3, which allow you to extend the functionality of JReviews without the need for core customizations.
If you are not familiar with Zapier, it is a very cool service that easily allows you to automate a series of tasks to establish a workflow between multiple unrelated web services. There are thousands of apps in Zapier that you can use to create automated workflows and you can use the same approach I will show you in this tutorial to automatically post to Twitter, Facebook, Slack and many other services supported by Zapier.
You can also find the code used in this tutorial on Github.
Requirements to integrate JReviews with Pinterest using Zapier
To be able to complete this tutorial you need:
- JReviews 3
- JReviews Queue Add-on (free) for autopublished listings (not moderated)
- The Queue Add-on allows certain tasks to be added to a queue to be executed at a later time. With autopublished listings, this provides additional time for the person submitting the listing to also upload the listing photos before the listing data is shared with Zapier.
- Zapier and Pinterest accounts
- Server file access to your server to create the necessary files.
How does the JReviews integration with Zapier work?
Before we jump into the implementation, I want to give you a general overview of how it works so it's easier for you to follow the steps below. Whenever a new listing is submitted n JReviews, there are multiple events fired within the JReviews code. See the complete list of Listing Events. For this integration we are going to listen to the "ListingWasFirstPublished" event by creating a new "PostListingToPinterestViaZapier" event listener. So whenever the "ListingWasFirstPublished" event is fired, our new "PostListingToPinterestViaZapier" listener will be notified. The responsibility of this Zapier listener is to put together the listing paypload we want to send to Zapier and then make the corresponding request to a Zapier webhook that will execute the Zap! Lets jump in.
Steps to integrate JReviews with Pinterest using Zapier
- Create a Zapier Event Listener Provider
- Create the SendNewListingToZapier Event Listener
- Clear the JReviews file registry
- Create a new Zap in Zapier
- Add the "Catch Hook" trigger to the Zap
- Add the Pinterest "Create Pin" action to the Zap
Create a Zapier Event Listener Provider
In this step we create a new Zapier Event Listener Provider which allows us to associate listeners to specific events. In this particular case, we will associate a listener that sends information about a newly created listing to Zapier. whenever a new listing is created. Since we want to send the information only when the new listing is published, not when it goes into moderation, we can use the "ListingWasFirstPublished" event and define a "PostListingToPinterestViaZapier" listener for this event.
In Joomla create the following file:
/templates/jreviews_overrides/events/providers/zapier_listener_provider.php
In WordPress create the following file:
/jreviews_overrides/events/providers/zapier_listener_provider.php
Copy the code below to the new file and save.
<?php
defined( 'MVC_FRAMEWORK') or die;

use Clickfwd\Listener\ListenerProvider;

class ZapierListenerProvider extends ListenerProvider
{
	protected $listen = [
		'JReviews\Events\ListingWasFirstPublished' => [
			'JReviews\Listeners\PostListingToPinterestViaZapier',
		]
	];
}
Create the "PostListingToPinterestViaZapier" Event Listener
This file is responsible for communicating with Zapier to send the new listing payload. We are not sending the entire listing data, but instead we are creating a $payload array with just some listing information that is needed for the Pinterest integration. When you work on your own integrations you can add any other information you need to the $payload array.
In Joomla create the following file:
/templates/jreviews_overrides/events/listeners/post_listing_to_pinterest_via_zapier.php
In WordPress create the following file:
/jreviews_overrides/events/listeners/post_listing_to_pinterest_via_zapier.php
Copy the code below to the new file and save.
<?php
namespace JReviews\Listeners;

defined( 'MVC_FRAMEWORK') or die;

use cmsFramework;
use S2Array;
use JReviews\Listeners\Traits\ListenerSetting;
use Clickfwd\Listener\QueueableListener;
use Clickfwd\Event\EventInterface;

\S2App::import('ListenerTrait','listener_setting','jreviews');

class PostListingToPinterestViaZapier extends QueueableListener
{
    use ListenerSetting;

    /**
     * Add task to the queue
     * @var bool
     */
	protected $queue = false;

    /**
     * Execution delay in seconds
     * @var int
     */
    protected $queue_delay = 5*60;

    /**
     * Webhook URL
     * @var string
     */
	protected $webhook = '';

    public function handle(EventInterface $event)
    {
		$listing = $event->getListing();

		if ( $listing )
		{
			$mainMediaUrl = S2Array::get($listing,'MainMedia.media_info.image.url');

			// Only send request if there's a main media photo for the listing
			if ( $mainMediaUrl )
			{
				// Build the listing payload that will be sent to the Zapier webhook
				$payload = [
					'title' => $listing['Listing']['title'],
					'summary' => strip_tags($listing['Listing']['summary']),
					'summary_html' => $listing['Listing']['summary'],
					'description' => strip_tags($listing['Listing']['description']),
					'description_html' => $listing['Listing']['description'],
					'category' => $listing['Category']['title'],
					'directory' => $listing['Directory']['title'],
					'listing_url' => cmsFramework::route($listing['Listing']['url']),
					'main_media_url'=> $mainMediaUrl,
				];

				$response = \FWDHttp::post($this->webhook, $payload);
			}
		}
    }
}
Clear the JReviews file registy
Go to the JReviews admin dashboard and use the maintenance link on the sidebar to clear the registry. This is necessary so JReviews can recognize the new files you created in the previous steps.
Create a new Zap in Zapier using the "Webhooks" and "Pinterest" Apps
Log in to your Zapier account and click the "Make a Zap" button at the top of the page. Fill in the name for your Zap "Post new listing to Pinterest" and then for the first step, the trigger, we are going to use the "Webhooks" App.
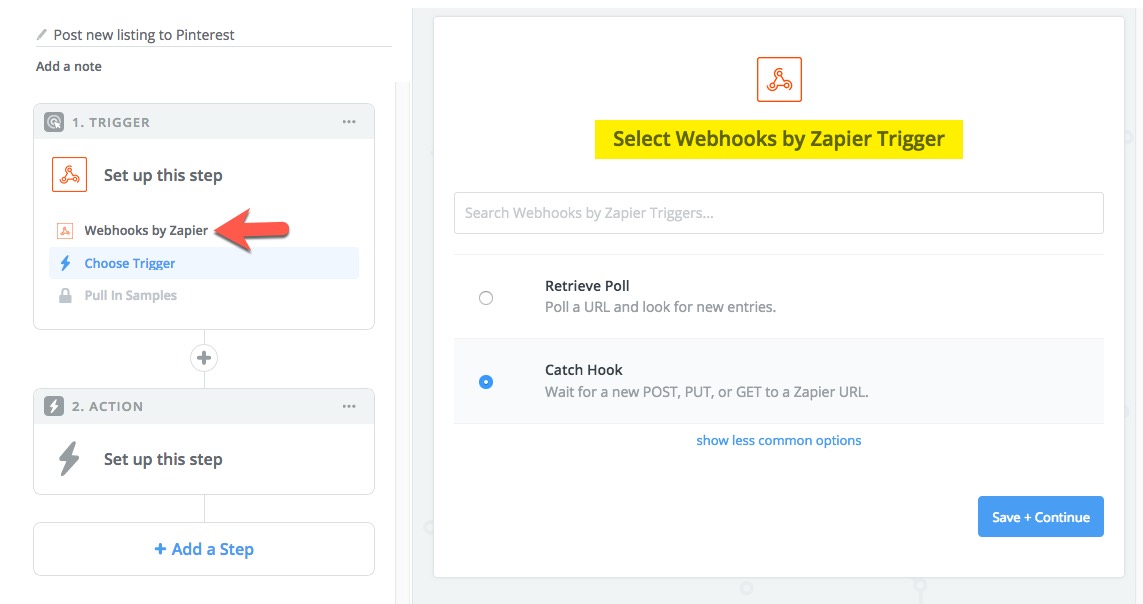
Save and continue. Skip the next step for "Pick off a Child Key" and click "Continue". Next, on the "Pick A Sample To Set Up Your Zap" step, copy the webhook URL and paste it as the value of the $webhook variable in the "PostListingToPinterestViaZapier" listener file you created earlier and save the file.
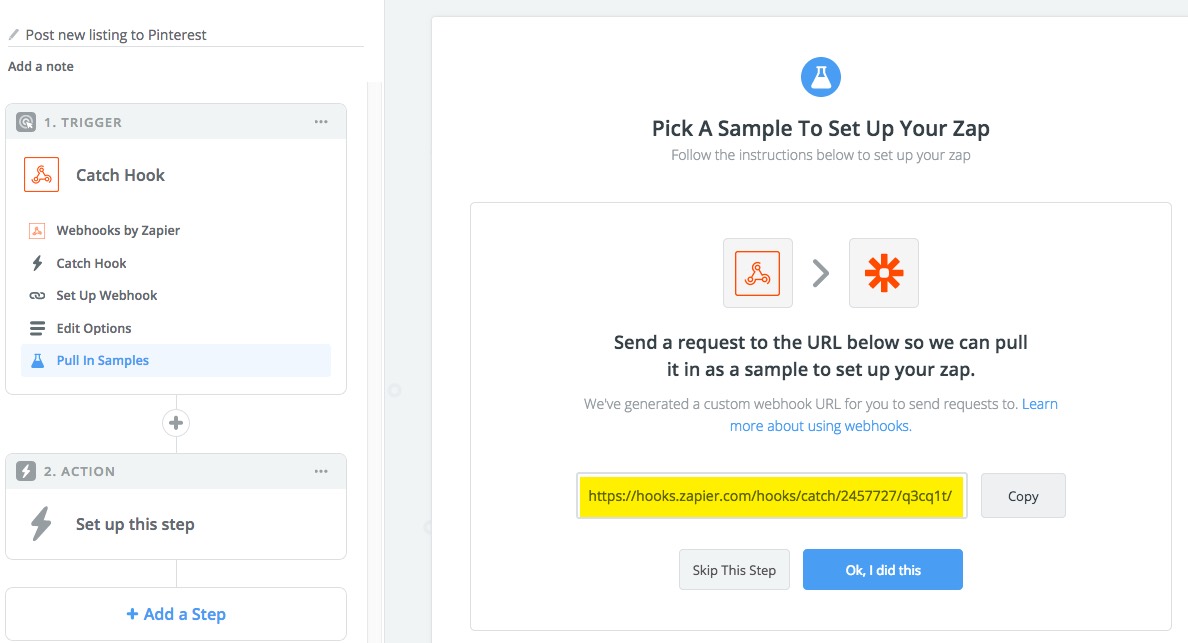
Below you can see what the updated $webhook variable would look like after you update it with the value copied from Zapier.
protected $webhook = 'https://hooks.zapier.com/hooks/catch/2457727/q3cq1t/';Back on the Zapier website, click the "Ok, I did this" button to complete this step.
Now, open a new browser tab to load your JReviews site to create a new listing. For this step. I recommend enabling listing moderation in the JReviews Access settings. Create a new listing and upload a photo for the listing. Then head over to the JReviews dashboard and in the listings moderation page approve the listing. This will send the listing payload data to Zapier. Switch back to the Zapier website tab and you should see that it was able to successfully read the data sent by JReviews. You can repeat this step as many times as you want for testing purposes.
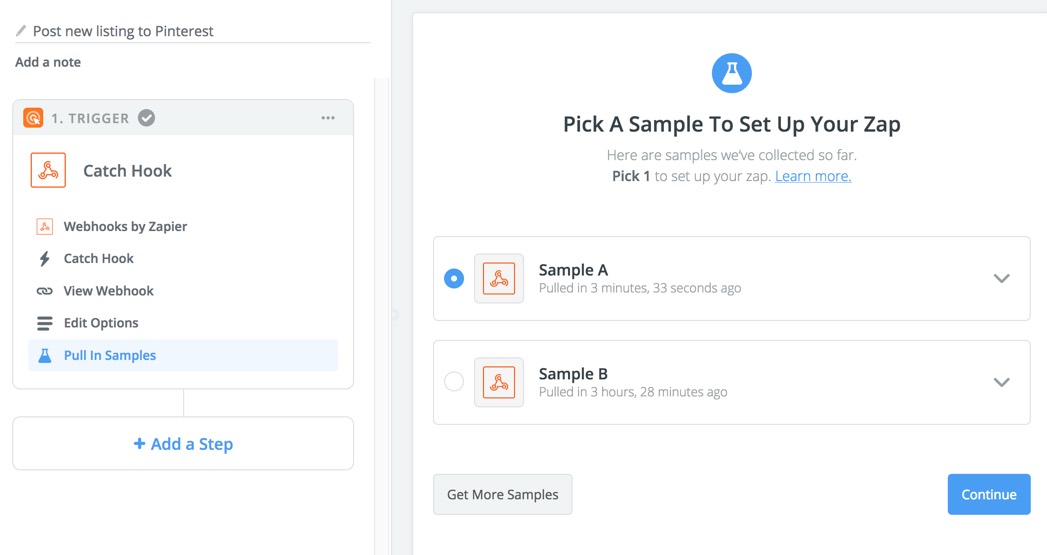
Click on the Sample down arrow to view the data received from your site and then click "Continue" to go to the next step.
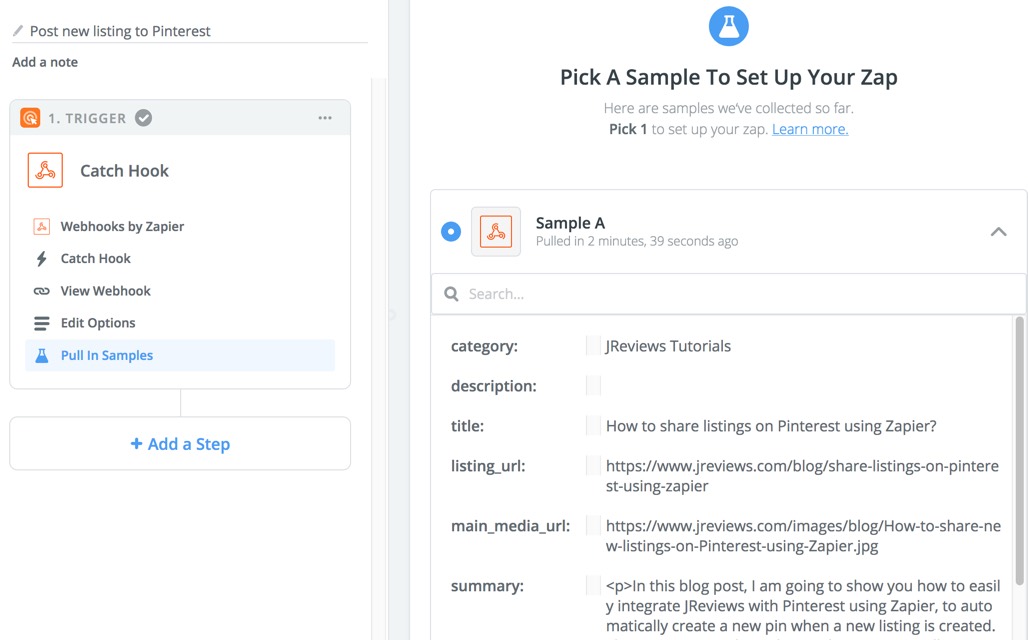
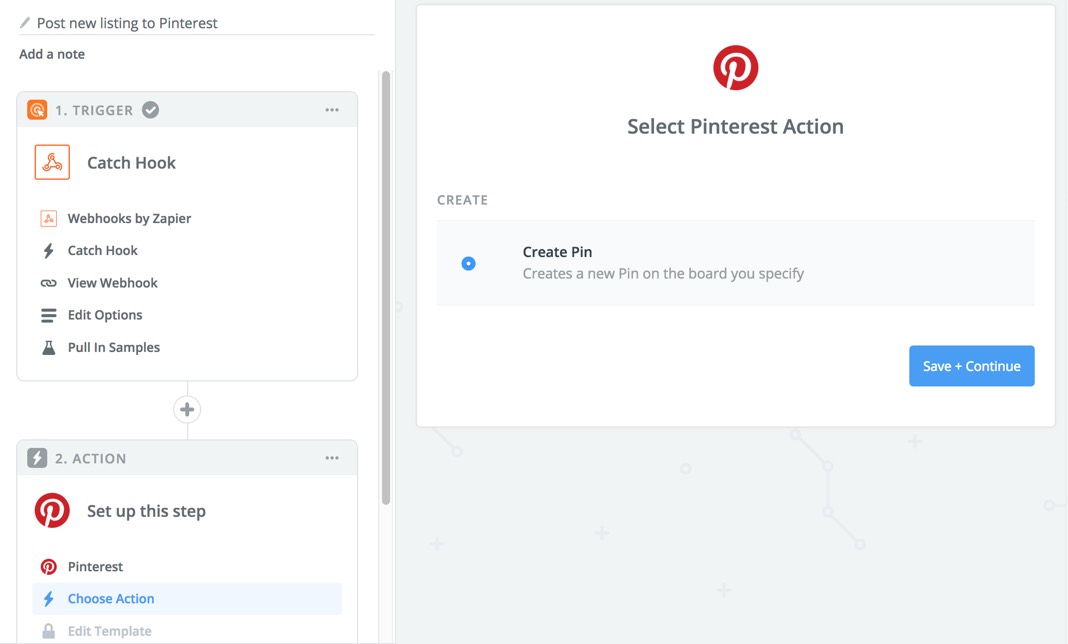
Now we need to tell Zapier what we want to do with the data. Choose the "Pinterest" app for the Zap action, select the "Create Pin" option and click "Continue".
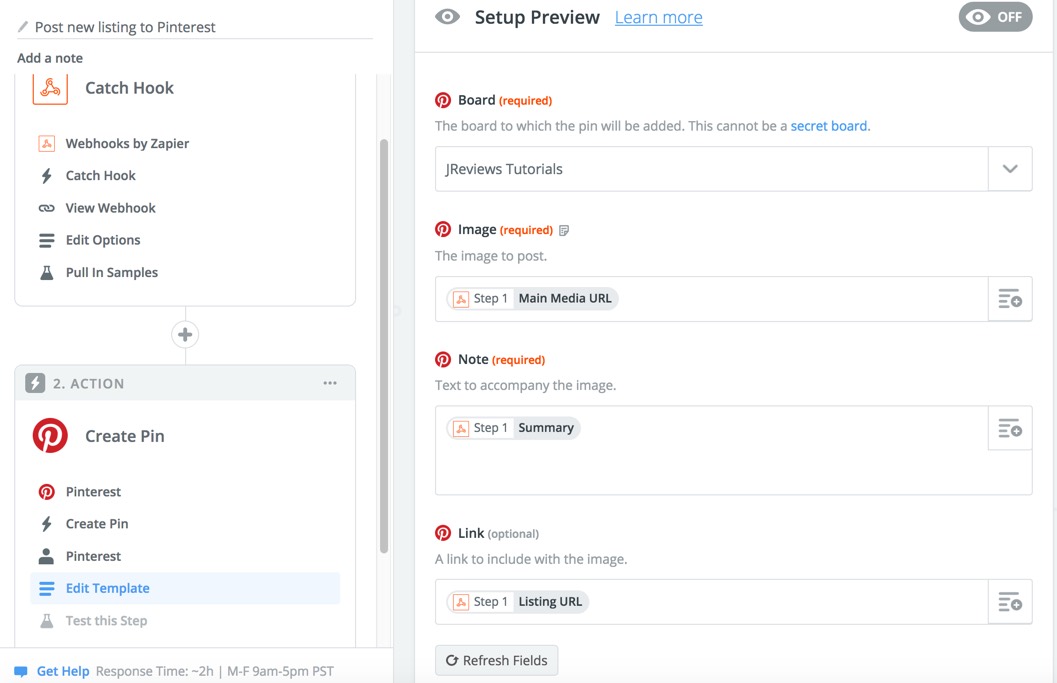
In the "Edit Template" step you will map the listing data to the Pinterest fields. Select the Pinterest board where you want the new pins to be posted. Then match the Image field to the "Main Media Url", The Note field to the "Summary" and the Link field to the "Listing URL".
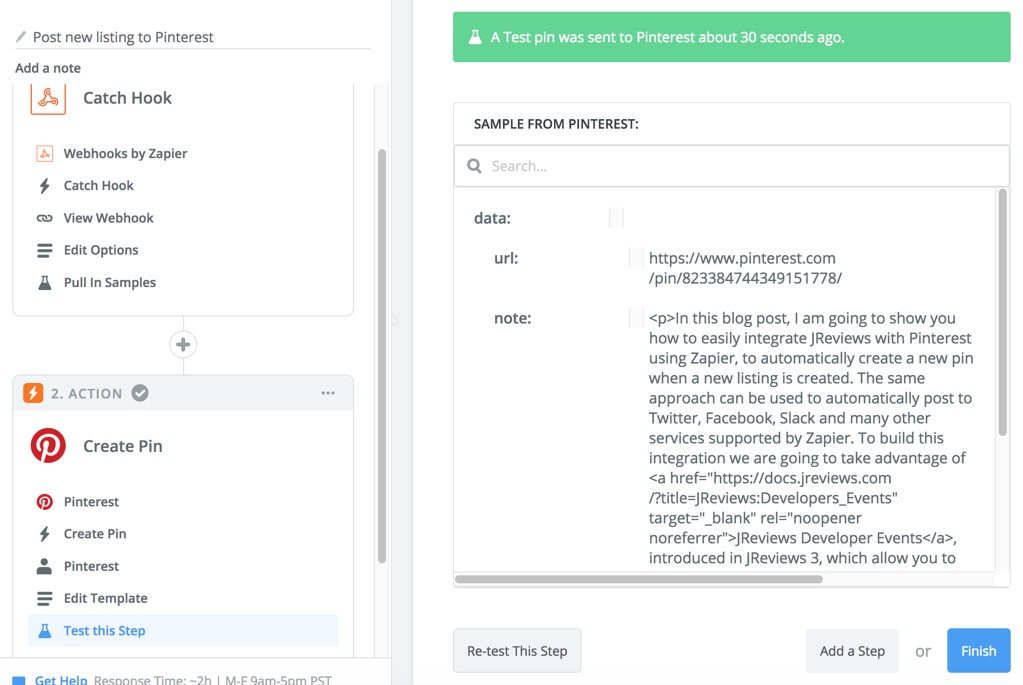
To test the setup click "Send Test to Pinterest" and you should see a success message. You can open a new tab and navigate to your Pinterest account to find the new pin.
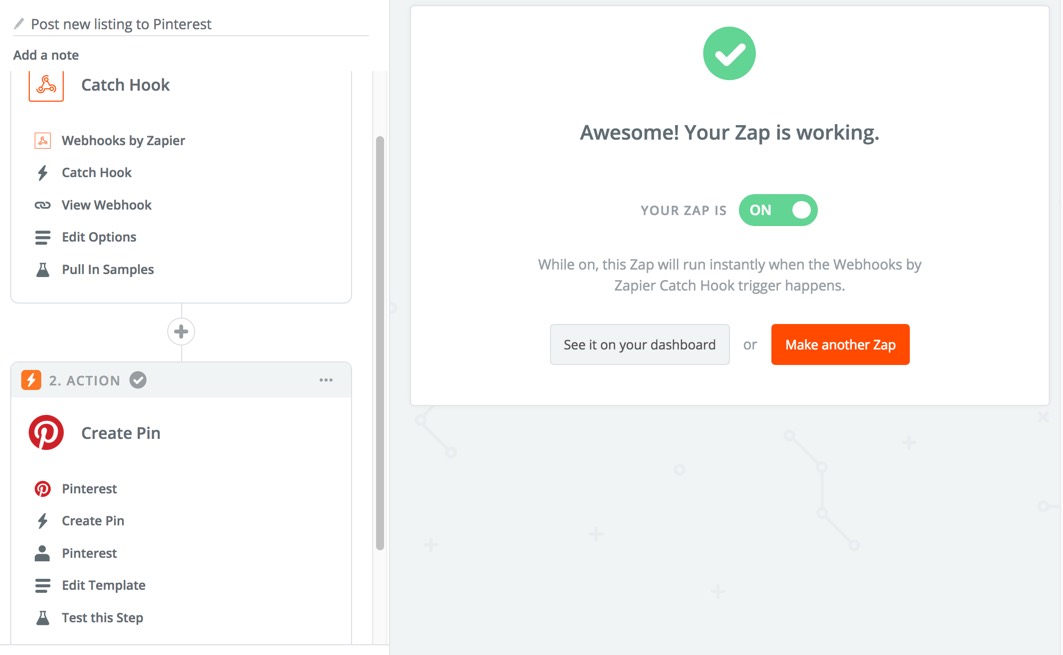
Click "Finish" and enable the Zap.
If you want to stop posting to Pinterest at any time just disable the Zap. You can also comment the line that associates the listener to the event in the provider:
<?php
	protected $listen = [
		'JReviews\Events\ListingWasFirstPublished' => [
	//		'JReviews\Listeners\PostListingToPinterestViaZapier',
		]
	];
Taking it a step further with the Queue Add-on
If listings are auto published on your site (not moderated), then it is necessary to use the Queue Add-on to introduce a delay after the listing submission and before the request is made to Zapier to send the listing data. Using the Queue Add-on also offers the advantage of not affecting the performance of the listing submission or causing any potential errors if the integration fails. All of this is explained in the detailed in the documentation for the Queue Add-on. Make sure you check the requirements and follow the installation and setup instructions.
To make the listener queuable you need to update the listener code above by changing the $queue variable to true. You can also modify the default delay from 5 minutes to a number that better fits your usage requirements.
    /**
     * Add task to the queue
     * @var bool
     */
	protected $queue = true;

    /**
     * Execution delay in seconds
     * @var int
     */
    protected $queue_delay = 5*60;
Integrating with other services
Now that you have this working, you can try adding additional steps to your Zap, or creating new listeners, to post the listing to other services like Twitter, Facebook Pages, and Slack.
I hope you find this How to share new listings on Pinterest using Zapier tutorial useful! Please let me know in the comments below.