Assign custom marker icons for your listings by category, or by custom field options.
Overview
The Add-on will show pin icons for listing markers, the default being red, and a blue one for featured listings.
It's possible to assign different marker icons to listings based on category and also through field options assigned to a custom field. The latter is useful when you need different marker icons even within the same category.
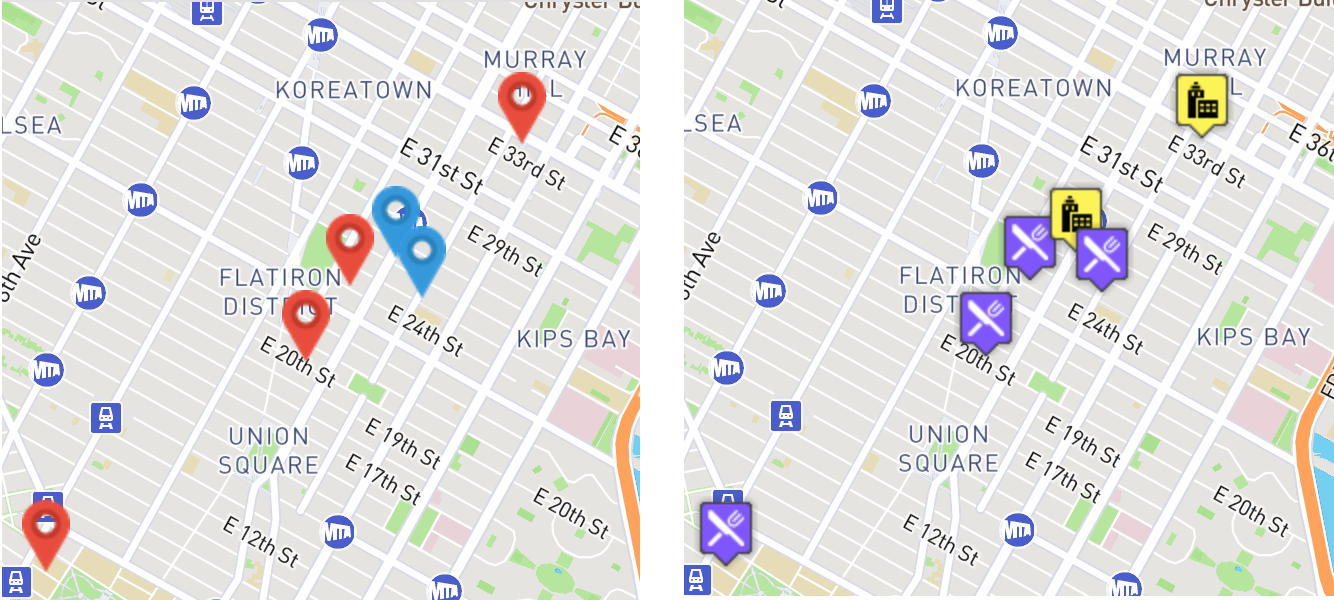 Default markers on the left, and custom markers on the right
Marker Icons Folder
The default location for the marker icons is within the MapsPro Add-on icons folder.
Joomla
components/
`-- com_jreviews_addons/
    `-- maps/
        `-- icons/
WordPress
wp-content/
`-- plugins/
    `-- jreviews_addons/
        `-- maps/
            `-- icons/
If you want to use your own markers, don't upload them to this core location. Instead create a new folder within your JReviews overrides and upload the icons there.
You must also update the marker icons path in the Add-on Configuration → Markers & Infowindow. When you change the icons folder, all icons will be loaded from this folder.
You can have two types of icons for listings. The standard icon, and a featured icon shown when a listing is set as featured.
To use featured icons, you just need to suffix the icon name with featured. For example, for restaurant listings you could use this set of icons:
- restaurant.png
- restaurant_featured.png
The Add-on will automatically detect the featured icon if present and use it.
You can also assign a different icon to be shown on mouseover. These requires using two additional marker icon images for the standard and featured icons with the _hover prefix:
- restaurant_hover.png
- restaurant_featured_hover.png
Again, the Add-on will automatically detect if these icons are present and use them.
Category Markers
Assigning marker icons to categories is quite simple.
- Go to the Add-on's
Assign Custom Markers page.
- Select one or multiple categories to assign a single marker.
- Click
Assign Markers and a modal will appear with a list of icons to choose from.
- Select a marker and click
Save.
You can add your own markers to choose from within the modal. If you added your own markers to the icons folder as explained above, you should see them in the modal in step 3.
Custom Field Markers
If you want to assign marker icons based on a custom field, you need to use a single select or radiobutton custom field. These allow a single option to be selected and listings can only have a one marker icon.
For each option in that field, associate an image corresponding to the marker icon.
- Only the image name is needed in the field option image setting (e.g. restaurant.png, hotel.png)
- The image also needs to be present in the marker icons folder
- To use the marker icon image only for maps, and not the field output, it's necessary to disable
Show option images in field's Advanced Settings.
- To show the image in the custom field output, in addition to showing it as the marker icon, then a duplicate needs to be uploaded to the
theme_images folder in your custom theme.
Once you've associated option images and uploaded the necessary icons:
- Go to the Add-on's
Assign Custom Markers page.
- Select one or multiple categories to assign a single marker.
- Click
Assign Markers and a modal will appear with a list of icons to choose from.
- Use the
Field input to fill out the name of the custom field with the option images. Then click Save.